
Hey Entrepreneurs! We are super pumped to announce our latest version of Wooberly v2.0.
Know about Wooberly!
Wooberly is our on-demand platform that helps entrepreneurs start their taxi businesses. Wooberly’s features and functionalities are unique in the market which makes us and our customers proud!
Our platform is 100% customizable, flexible, and scalable. And you are very welcome to check out our product page!
Chop! Chop! Let’s get to know what is amazing about this NEW version!
We introduced a feature called ‘Multiple stops’ in the riders app. It’ll enable the riders to add two more stops, driver’s app’s respective sections excluding the pickup and drop-off location while booking.
A step-by-step guide on how the ‘Multiple stop’ feature works:
Let’s get to know the step-by-step process of how the multiple stop feature works on the rider app, and how it reflects on the driver app and the admin panel respectively!
1. How does the Multiple stops feature work in the riders app?
Step 1: Log into the Wooberly riders’ app by giving your phone number, name, and email id.
Step 2: Click on the search location bar.
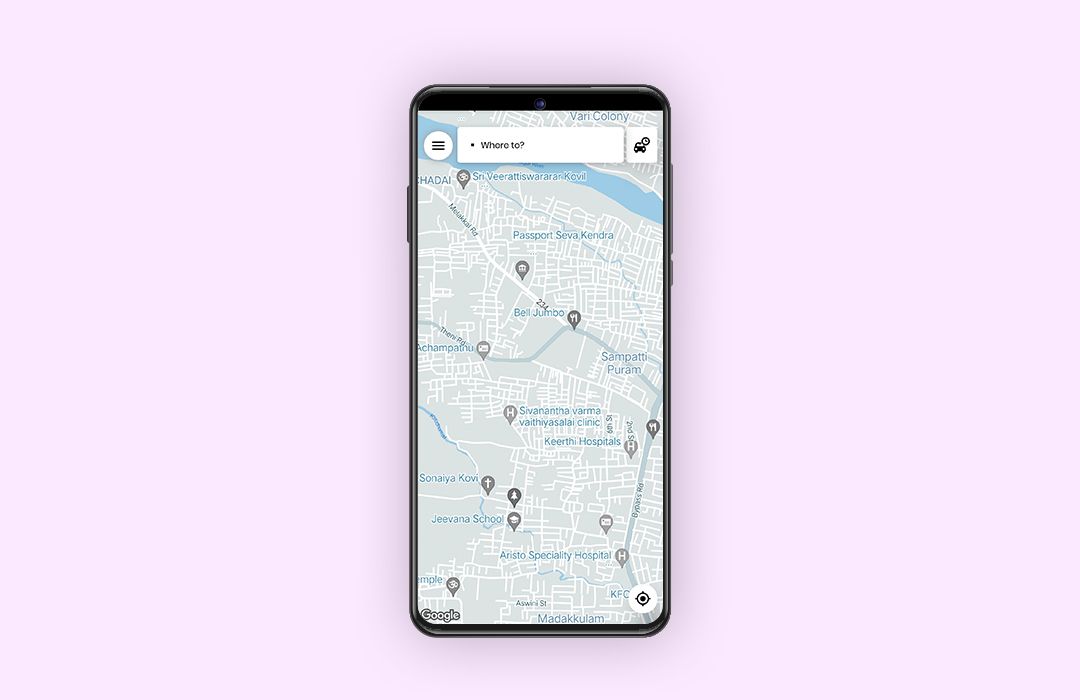
Step 3: Type out your pick-up location and you’ll see a ‘+’ symbol on the right corner of the location bar.
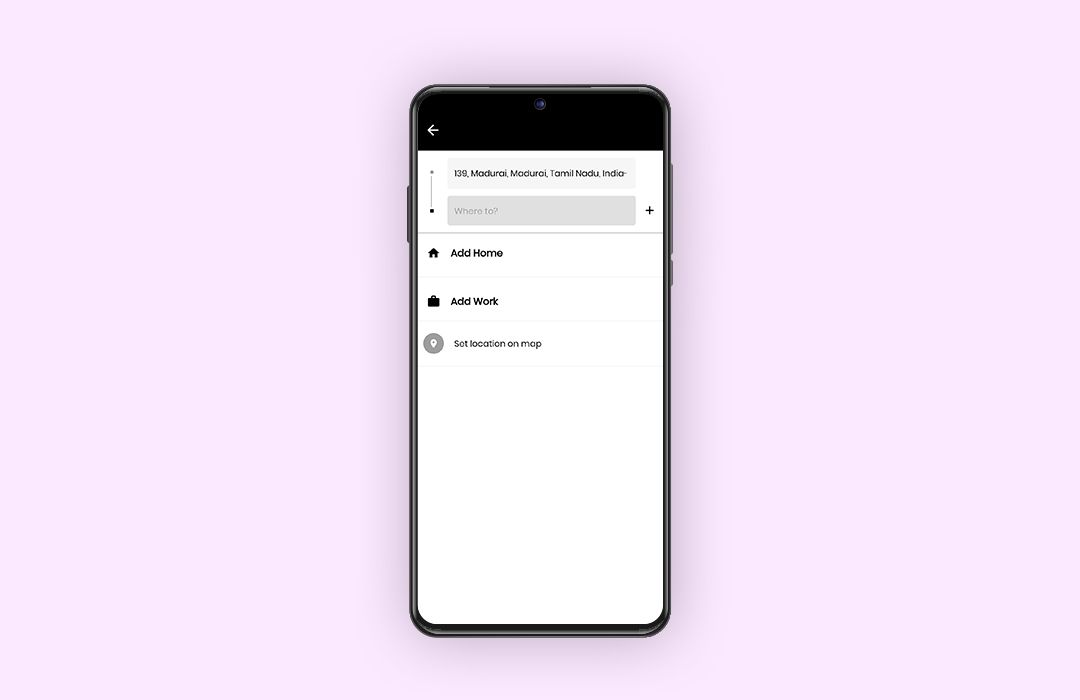
Step 4: Click on the ‘+’ sign to add two more locations (maximum) before entering the drop-off location.
Note:
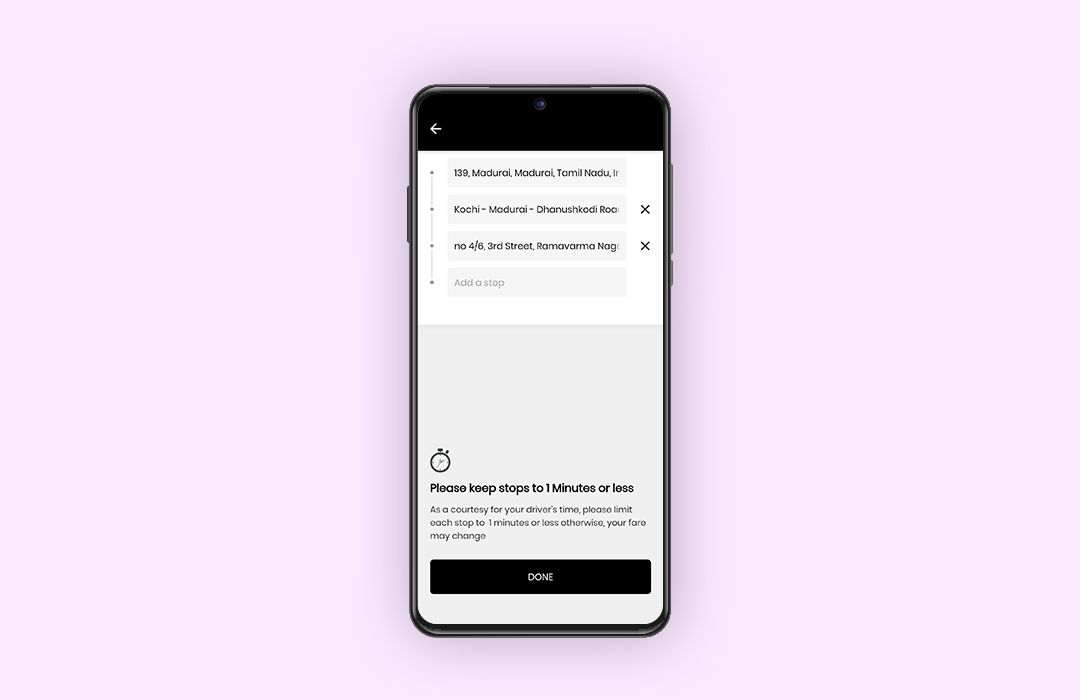
- There’s a fixed time for every stop. You’ll see a pop-up notification providing the rider instructions on the stop time and a warning regarding the ride fare changes if the time is extended. The time limit is set by the admin. It’ll be explained in detail when the admin panel workflow is disclosed!
- The riders can add the stop locations while booking. They can change/delete the stop even after the ride begins. But they can’t remove the ongoing stop.
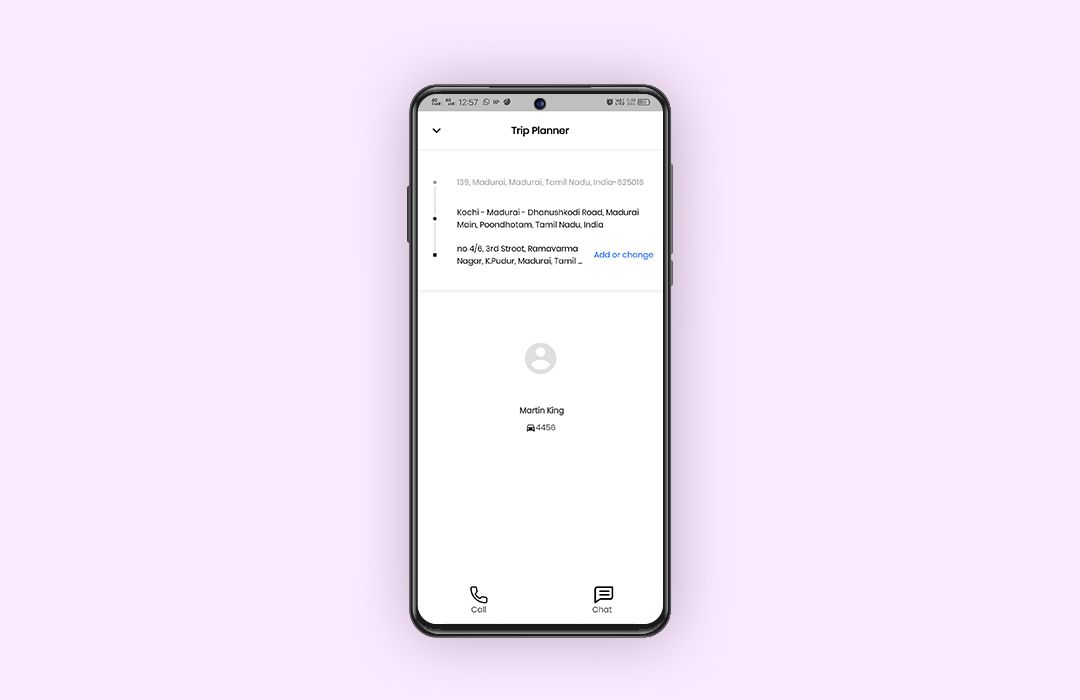
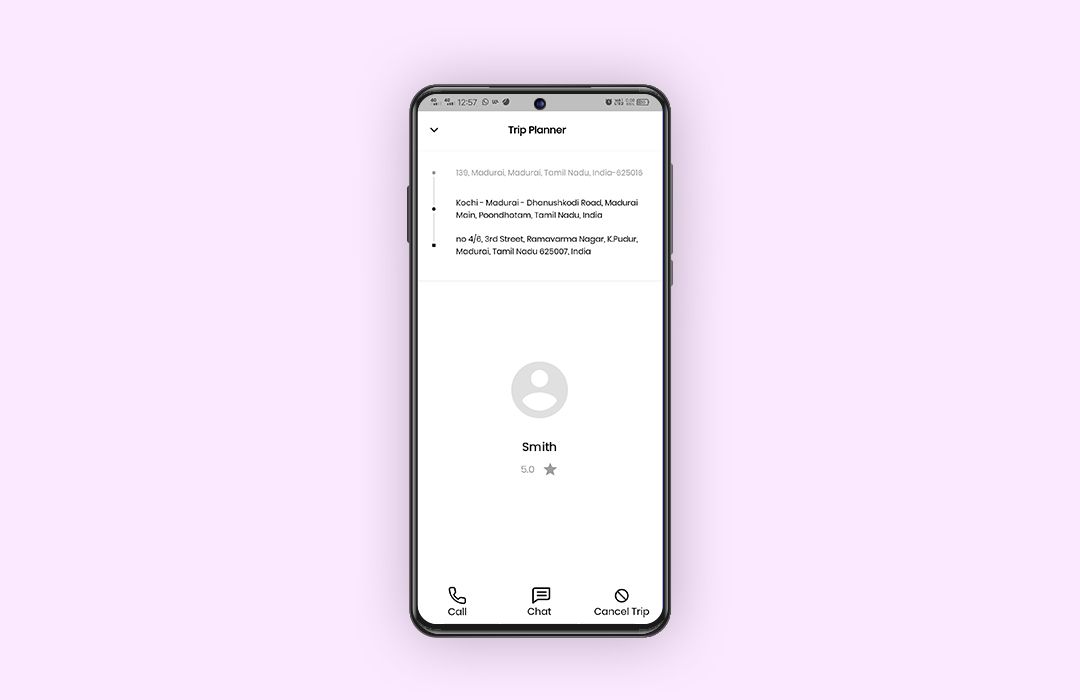
- The rider can access the trip planner when they click on the upward arrow at the bottom of the screen next to the driver details to add /delete/ change the locations. And there will be a pop-up notification warning about the price changes based on the changes made.
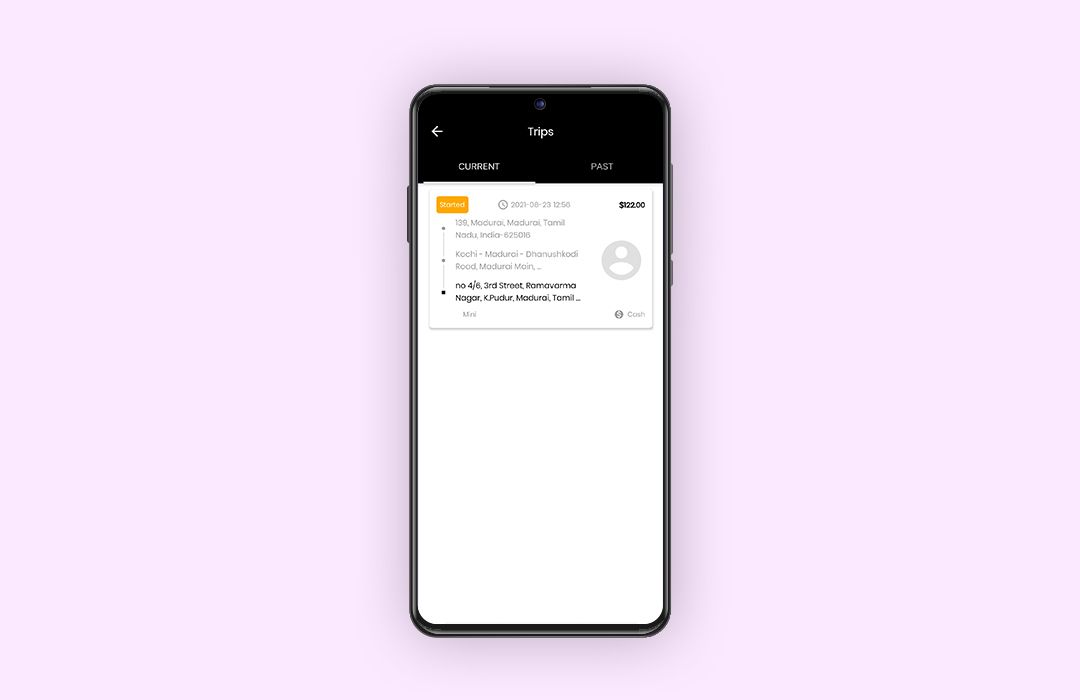
- The rider can see the driver name, ratings, multi-stop locations, the trip amount, the trip duration, and distance in the ‘Past trip’ once the ride is completed.
- The multiple stops will also show on the ‘Current trip’ section when the ride is in function.
2. How does Multiple stop work in the driver’s app?
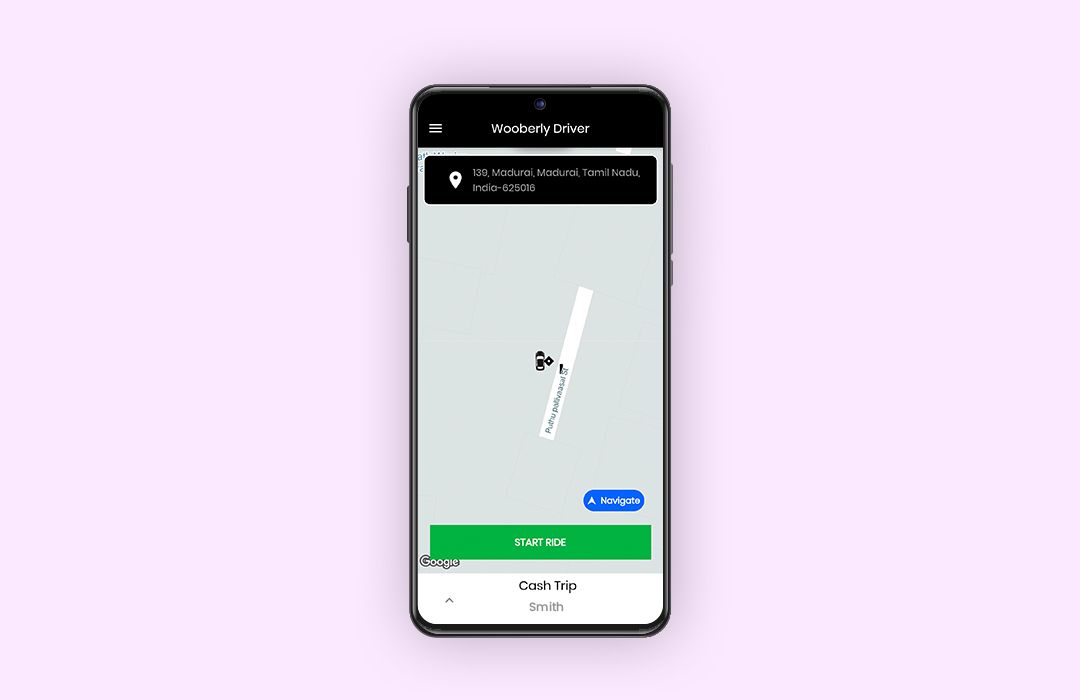
Step 1: After the driver accepts the ride, the driver can access the trip planner where they can see the pickup, multiple stops, and the drop-off location.
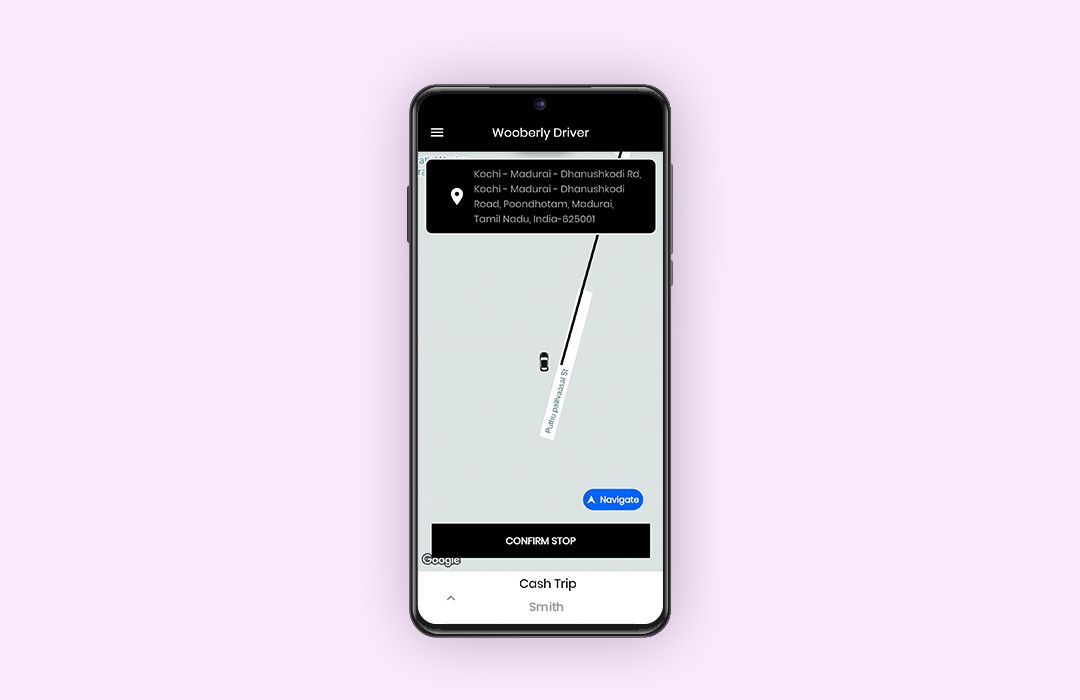
Step 2: Then the driver can click on the start ride and there’ll be a button below asking the driver to ‘Confirm stop’ when they reach the stop.
Step 3: When the driver reaches the drop-off location, there will be a ‘Complete ride’ button for him to finish the ride.

Note:
- The driver can check the trip planner by clicking on the upward arrow next to the rider’s name.
- Each location turns grey once the destination arrives. Every location turns grey once the ride is completed. And also the driver will receive a push notification once each stop and the final destination is reached.
- The driver can check the rider name, rating, stop locations, trip earning split up, duration, and trip distance in the ‘Past trip’ section in the driver’s app.
- The multiple stops will also be displayed on the ‘Current trip’ section when the ride is in motion.
3. How can the admin see the multiple stops in his admin panel?
Step 1: Log in to the admin panel.
Step 2: Click on the ‘Manage bookings’ which appears in the left corner of the admin dashboard.
Step 3: You’ll be directed to the ‘Manage bookings’ page. Scroll right until you find the ‘View’ button.
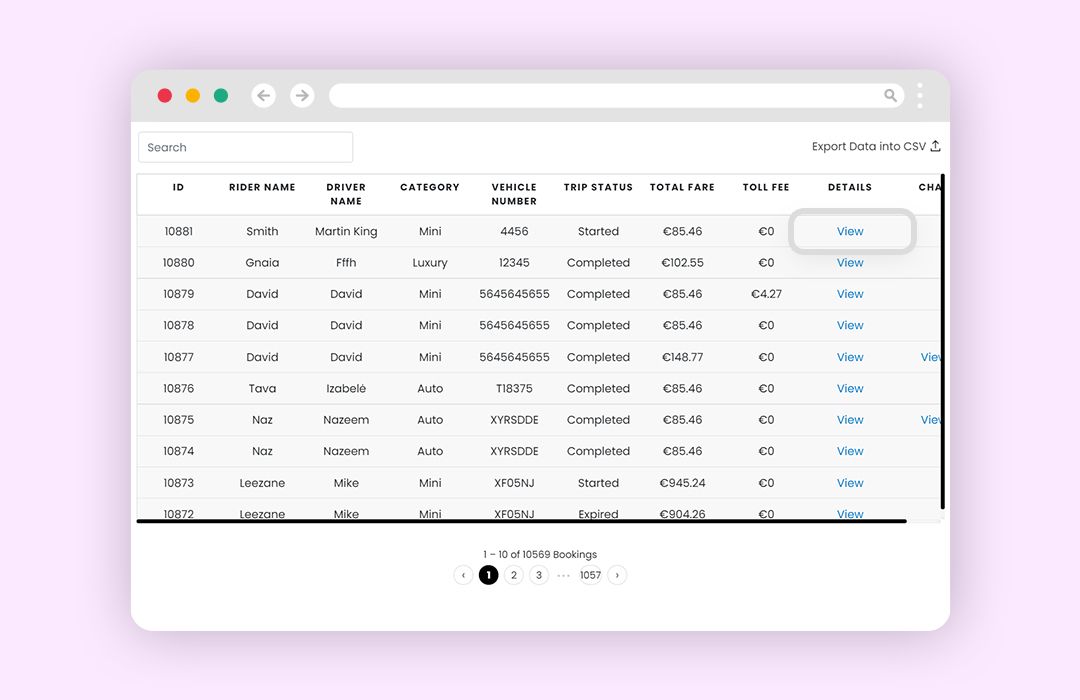
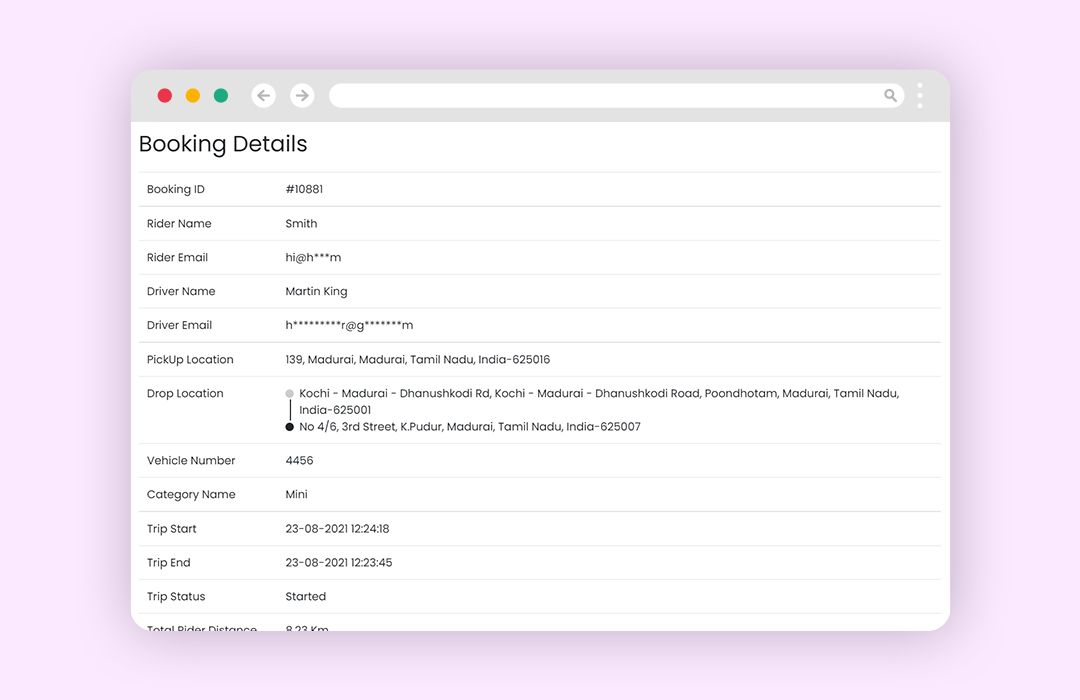
Step 4: Click on it to see the booking details. You’ll see all the ride-related details including the pickup, multiple stops, and drop-off location.
Note:
The admin can also see the multiple stops in the Completed bookings and Cancelled bookings sections.
4. How can the admin set the stop time in the admin panel?
Step 1: Look for ‘Site Settings’ on the left side of the admin dashboard.
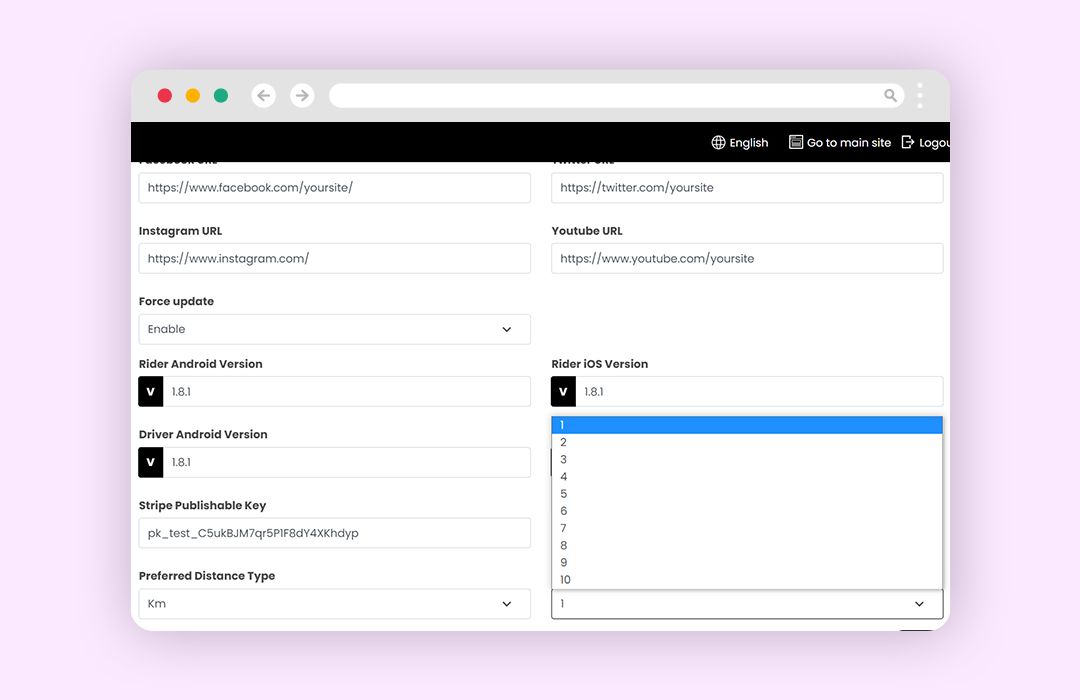
Step 2: Click on it and scroll down until you see ‘Multiple stop waiting time’.
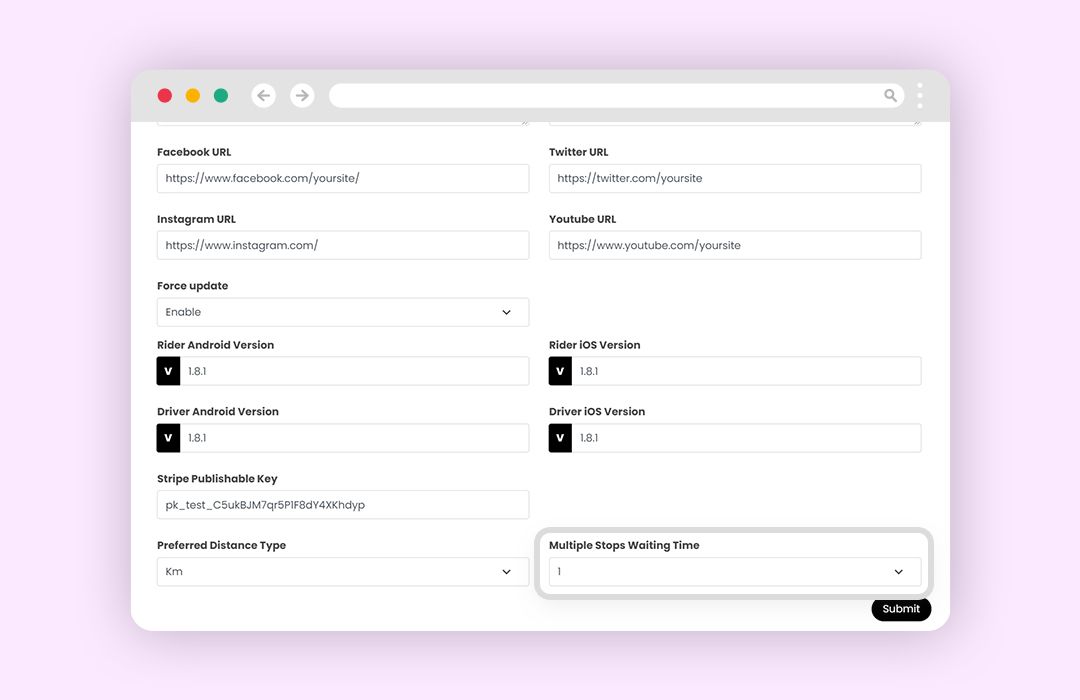
Step 3: The waiting time for the multiple stops can be adjusted between 1 minute to 10 minutes.
Step 4: Choose a time of your liking and click submit to save the changes.
Note:
- The admin can set the preferred distance type – Km/Miles. The ride distance and fare will be calculated based on the unit they choose.
These are some of the exciting updates that we made in our Wooberly v2.0.
Check out our FREE demo to get a hands-on experience of the NEW version!
Android:
iOS:
You have questions, right? Don’t hesitate to contact us on WhatsApp or drop us an email at support@radicalstart.com
To get more exciting updates → Subscribe to our ‘Newsletters’ and be the first person to hear about them!