Home
The definitive guide for non-tech entrepreneurs to create a first mobile app

4.32 billion people use mobile internet worldwide, and it's no surprise that you should create an app for your business to be there when your customers need you.
Ways of creating a mobile app for your business

Using readymade platforms: You can use the readymade platforms available in the market to create your app faster.

The methodology you choose to build your mobile app depends on your budget, time, use cases, etc. There is no one size fits all approach to this, so do your research.
How hard is it to create an app in 2024?
With the advancements of technology in recent years, creating an app is as easy as ordering a pizza online.
You can build and deploy your app faster than ever before using readymade or no-code platforms.
You don't have to be a tech geek!

With that said, let's look at the steps you can follow to create your first mobile app as a non-tech entrepreneur!
Find a purpose

Nothing is doable without having a specific goal in mind. You have to find a purpose for your app before you get into development.
Your app idea should match the purpose and benefit your audience in solving their problems.
Set SMART (Specific, Measurable, Achievable, Realistic, and Timely) goals and break down your goals into simple tasks/milestones before getting started.
Use Agile development methodology in your app development process to maximize productivity, minimize risks, and deliver the product faster.
Conduct a market research
After identifying an idea for your app, it's time to do your research to validate it.
Idea validation helps you understand whether there is a demand for the app you develop and how it solves the customer problems.
Competitive market research can also help you understand the problems that your competitors' users are having, and you can utilize this information to improve your app.
With market research, you can get an idea of the features you should include and what you shouldn't.
If there's no demand for a particular feature, you should not devote your time and effort to creating it even when your fiercest competitor has it in their app.
Pick your feature

After extensive market research, you should now have a clear picture of the necessities to build your app and the features to include.
As mentioned earlier, you don't have to build an entire app feature in a single launch.
You can start with a minimum viable product (MVP) and add features as you go!
Identify all of the features to be included in your app and rank them in order of importance.
And you can add features to your app depending on this priority at each of the milestones you established earlier.
Remember SMART goal?
Create a design

Now you have all the requirements in hand! Pass it on to your designer to create mockups and final designs for your app flow.
Also, if possible do UX research to identify the target users' needs and goals to enrich your app designs.
Transfer all the knowledge you have from the market research to your designer and work with them to produce the best result possible.
You could use design tools like Figma or Adobe XD to create your app design.
Once you create your design, have a design review meet with your team to analyze the workflow.
Choose the platform
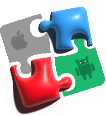
You must choose whether to develop an iOS app, an Android app, or both.
This can be solved by conducting thorough market research on your product.
If you found you have an almost equal demand on both platforms, it is wise to create both.
Pick a technology

Are you decided on the platforms you are going to build your apps?
If you decided to create iOS and Android apps separately, you could use Native technologies like Swift and Kotlin.
Another option is to use cross-platform technology to create Android and iOS applications using a single code.
A few cross-platform technologies are Flutter, Xamarin, React Native, etc.
Be proactive in choosing your technology to make your app function better!
💡 Pro-tip: We have used Flutter to build our readymade on-demand apps that ultimately reduced our cost of development and time.
Identify how to create

As we discussed earlier, there are multiple ways to develop your mobile app. Now, you should choose the method you prefer.
If you want to build a marketplace app like Uber, Airbnb, UberEats, Turo, Instacart, we offer readymade products that will help you.
Also, if you want a detailed process of creating each app, we provided a list of guides below to help you with it.
Can't make the right decision? Write to us at [email protected] to get in touch with our experts.
Create an MVP

We're about to make your dream happen.
After you've weighed all of your options for mobile app development, it's time to create a minimal viable product (MVP).
An MVP contains features that are required for the app to function.
You can use your MVP to gauge interest in your product, get feedback, and scale it as your user base increases.
This way, you can minimize the risk of investing a large sum of money and effort into a product that won't last much longer.
Building an MVP is an integral part of agile development methodology.
Test your product

“Be a yardstick of quality. Some people aren’t used to an environment where excellence is expected.” — Steve Jobs
After developing your MVP, you should test the product quality before pushing it into the market.
Send the app build to your QA team so they may test it and provide feedback.
Diawi can be used to share the app build. It allows developers to share Android and iOS apps via a web link.
Basic functionalities, compatibility, user interface, accessibility, security, and other testing processes should be performed on your app.
💡 Pro-tip: Your testers should cover both positive and negative testing scenarios to uncover unexpected cases.
Positive scenario: It will be performed by assuming and providing valid data set for the app flow. In this test, you'll ensure your app performs well under known positive inputs.
Negative scenario: It will be performed by assuming and providing invalid data set for the app flow. In this test, you'll ensure your app performs as expected for the negative use cases. Conducting negative testing ensures a bug-free solution.
Launch it to store

🎉 Hurray!
You've put in all the effort. It's now time to submit your apps to the App Store and Play Store.
Both stores have different submission processes. However, to make the process easier, make sure you follow all of their instructions.
Here are the resources you should read before getting started with the submission:
✅ https://developer.android.com/studio/publish
✅ https://developer.apple.com/app-store/review/guidelines/
Once published, your app will be available for your customers to download and use.
How much does it cost to create an app?
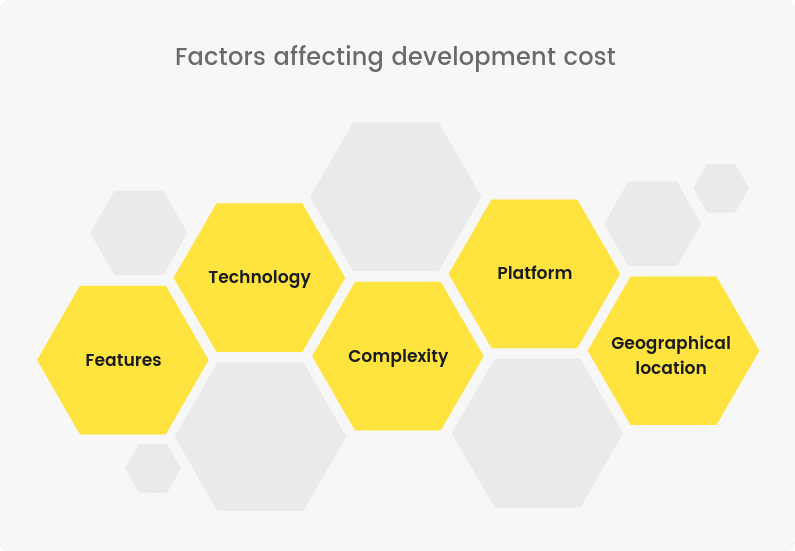
The app development cost in the US and UK is much higher than in the other regions.
The average cost of developing an app in the United States is between $60 and $125.
A simple mobile app would take 2 to 3 months to develop.
So on average, the cost to create a simple application would be $50000 to $80000.
It may differ depending on your location and the intricacy of your app.
How long does it take to create an app?
It's now easier than ever to create an app!
You have more than one way of creating your application.
✳️ If you build your app from scratch, it would take 3 to 6 months to complete it.
✳️ If you chose to use readymade apps like ours, then you can complete your development process within 2 to 3 weeks.
✳️ You can also use one of the many app builders on the market.
The development time, like the cost, is determined by the app's technology, features, and complexity.
5 tips to marketing your mobile app
Developing an app is only half of the battle. The rest is up to you to market it to get users on board. Here are some tips for promoting your mobile application:

Use ASO to optimize your app title, description, keywords, etc. to increase visibility.

Use social media marketing to reach your target audience.
Read our other specialized development guides

Courier delivery app
Find out how to make your courier delivery business a reality. This guide will teach you all you need to know about creating an Uber-style courier service app.

Medicine delivery app
This COVID, demand for pharmaceutical delivery was at an all-time high. This guide will walk you through the process of creating a medicine delivery app.

Deliveroo clone script
Deliveroo clone script is a robust food-delivery platform that let entrepreneurs build on-demand food-delivery platform into the market.

Create an app like UberEats
Get started with your food delivery business by creating your own delivery app. Learn everything you need to know to get started with the process.

Bottled water delivery app
Give your bottled water delivery business a boost by creating a user-friendly app for your customers. It will entice them to order services instantly.

Meat delivery app
The meat delivery business is accelerating at a rapid pace. You may reach more consumers and convert them in to recurring customers by developing an app.

Talabat clone
This blog provides you all the end-to-end information about the Talabat clone solution to kickstart your food delivery business.

Glovo clone
Glovo is a Spanish delivery company that allows people to get anything they want using their app. This guide talks about how you can create an app like Glovo.

Rappi clone
Rappi is an on-demand delivery company that delivers anything customers needs right to their doorstep. Learn how you can create an app like Rappi.

Alcohol delivery app development
The alcohol delivery business can run more efficiently when you move your business online. If you've thought about it, you should definitely read this!

Food delivery app development cost
Planning on starting an on-demand food delivery business? Shouldn’t you be knowing the app development cost? Read to know!

On demand fuel delivery app
Fuel delivery is in high demand right now, and it isn't going away anytime soon. To keep ahead of the competition, learn how to design a fuel delivery app.

Milk delivery app development
Let’s get to know the scope of the milk delivery app development, shall we? Also, we included a BONUS tip at the end of this article.

Food delivery app like doordash
Get started with your food delivery business by creating your own delivery app like DoorDash. Learn everything you need to know to get started.
FAQ
- Native app development
- Cross-platform app development
- Hybrid app development
- Progressive web apps
The visual and interactive elements that your users see when using your mobile app are known as the front end.
The backend is where all of the technical aspects of the application, such as data storage, retrieval, and processing, take place.
The user interface is what your users see and interact with. Better UI design makes your app user-friendly.
It depends entirely on your business requirements and demand among your target audience.
An integrated development environment (IDE) is a tool that facilitates developers to create mobile applications. Here are some famous IDEs to know,
- Microsoft Visual Studio
- NetBeans
- Android Studio
- Xcode
- Swift
- Kotlin
- Java
- JavaScript
- Dart
- Xamarin
NO! You don't have to be a coder to develop your mobile app. You can use readymade apps and no code builders to build your app.
- Food delivery
- Grocery delivery
- Telemedicine
- Privacy-focused social media
- Pet care
We help you create your marketplace apps like Uber, UberEats & Airbnb with the help of our readymade applications. Get in touch with us, share your idea, and we will take care of the rest.


